Giving My Robot Its First Sense: HC-SR04 Ultrasonic on Arduino UNO Q
Part 2 of "Building an Eldercare Robot" — HC-SR04 ultrasonic distance sensing via the MCU-MPU Bridge
I'm Ashish Disawal, a DevOps Trainer and Consultant with over 17 years of experience building and optimizing infrastructure across Healthcare, Digital Media, IT, and Analytics industries. I help organizations worldwide transform their development and deployment practices through automation, security, and cloud-native technologies.
Currently working as a freelance consultant, I specialize in designing secure, scalable infrastructure solutions using Kubernetes, Docker, AWS, Python, and Infrastructure as Code tools. My recent projects include implementing multi-tenant ML processing infrastructures, automating incident management workflows between ServiceNow and PagerDuty, and migrating Python-based SaaS applications to Kubernetes on AWS EKS.
Throughout my career, I've led high-performing teams and achieved significant results—from reducing Azure infrastructure costs by over 50% to building 20-member support teams from scratch. I'm particularly passionate about Slack administration and SaaS integrations, having developed custom workflows, bots, and apps that streamline team collaboration.
I hold multiple certifications including AWS Certified Developer - Associate, Certified Kubernetes Security Specialist, and ITIL Foundation. I've played pivotal roles in achieving and maintaining SOC2, HIPAA, and ISO 27001 compliance for organizations, implementing comprehensive security stacks and CI/CD pipelines with integrated security scanning.
Beyond consulting, I'm committed to knowledge sharing through my technical blog at PraHari.net, where I write about FastAPI, Kubernetes, AWS, and DevOps best practices. I believe in fostering collaborative environments, mentoring aspiring DevOps professionals, and aligning technical solutions with business objectives to deliver exceptional results.
In the last post, I got the Arduino UNO Q working from the command line — blink LED, SSH, deploy apps.
Now it's time to give the board its first real input: distance sensing with an HC-SR04 ultrasonic sensor. This is the sensor that will eventually let my eldercare robot detect walls, furniture, and doorways as it patrols a home.
But first — can pulseIn() even work on Zephyr RTOS?
Why This Matters
HomeGuard Parivaar needs to navigate rooms autonomously. That means obstacle detection. The HC-SR04 is the cheapest, most reliable way to measure distance — if it works on the UNO Q's STM32 MCU running Zephyr.
The interesting part isn't the sensor itself (it's well-documented everywhere). It's the pattern:
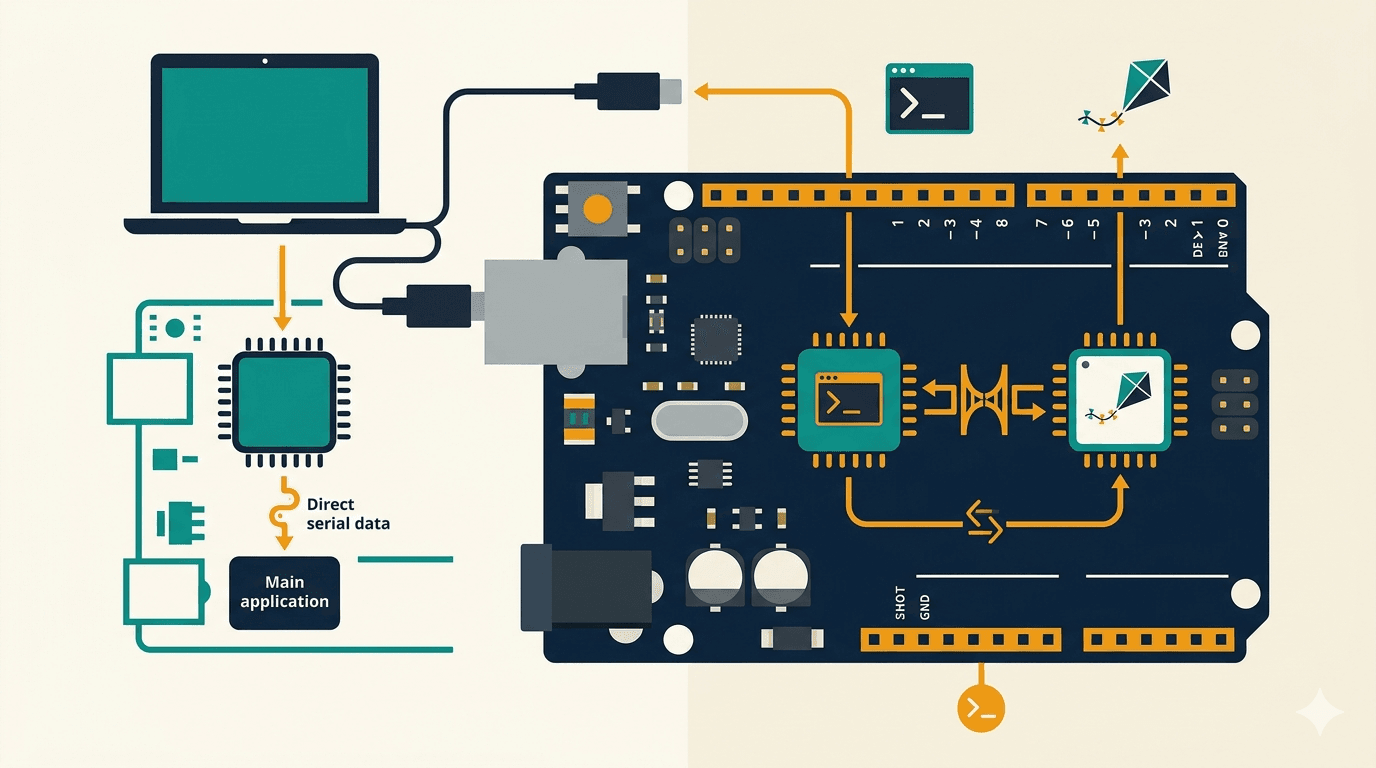
The MCU reads the sensor in its own tight loop
The Python side on the MPU polls for data via Bridge whenever it needs it
Neither side blocks the other
This decoupled architecture is how all of the robot's sensors will work.
What We're Building
By the end of this post, you'll have:
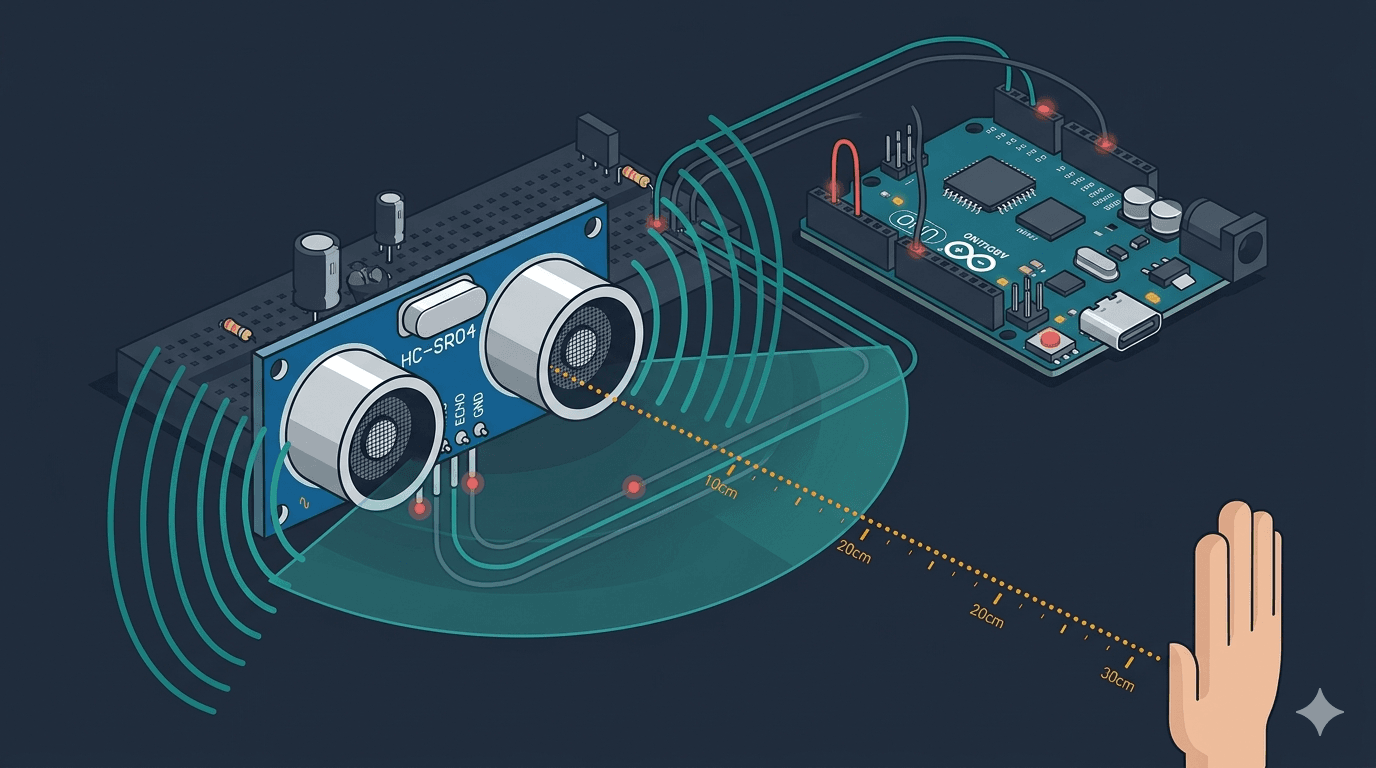
An HC-SR04 wired to the UNO Q's MCU pins
A sketch that reads distance continuously and exposes it via Bridge
A Python script that polls and prints distance readings
Confidence that timing-sensitive Arduino functions work under Zephyr
Hardware You'll Need
| Component | Notes |
|---|---|
| Arduino UNO Q | CLI setup complete (see Part 1) |
| HC-SR04 ultrasonic sensor | ~$2, widely available |
| 4x jumper wires (F-M) | VCC, GND, TRIG, ECHO |
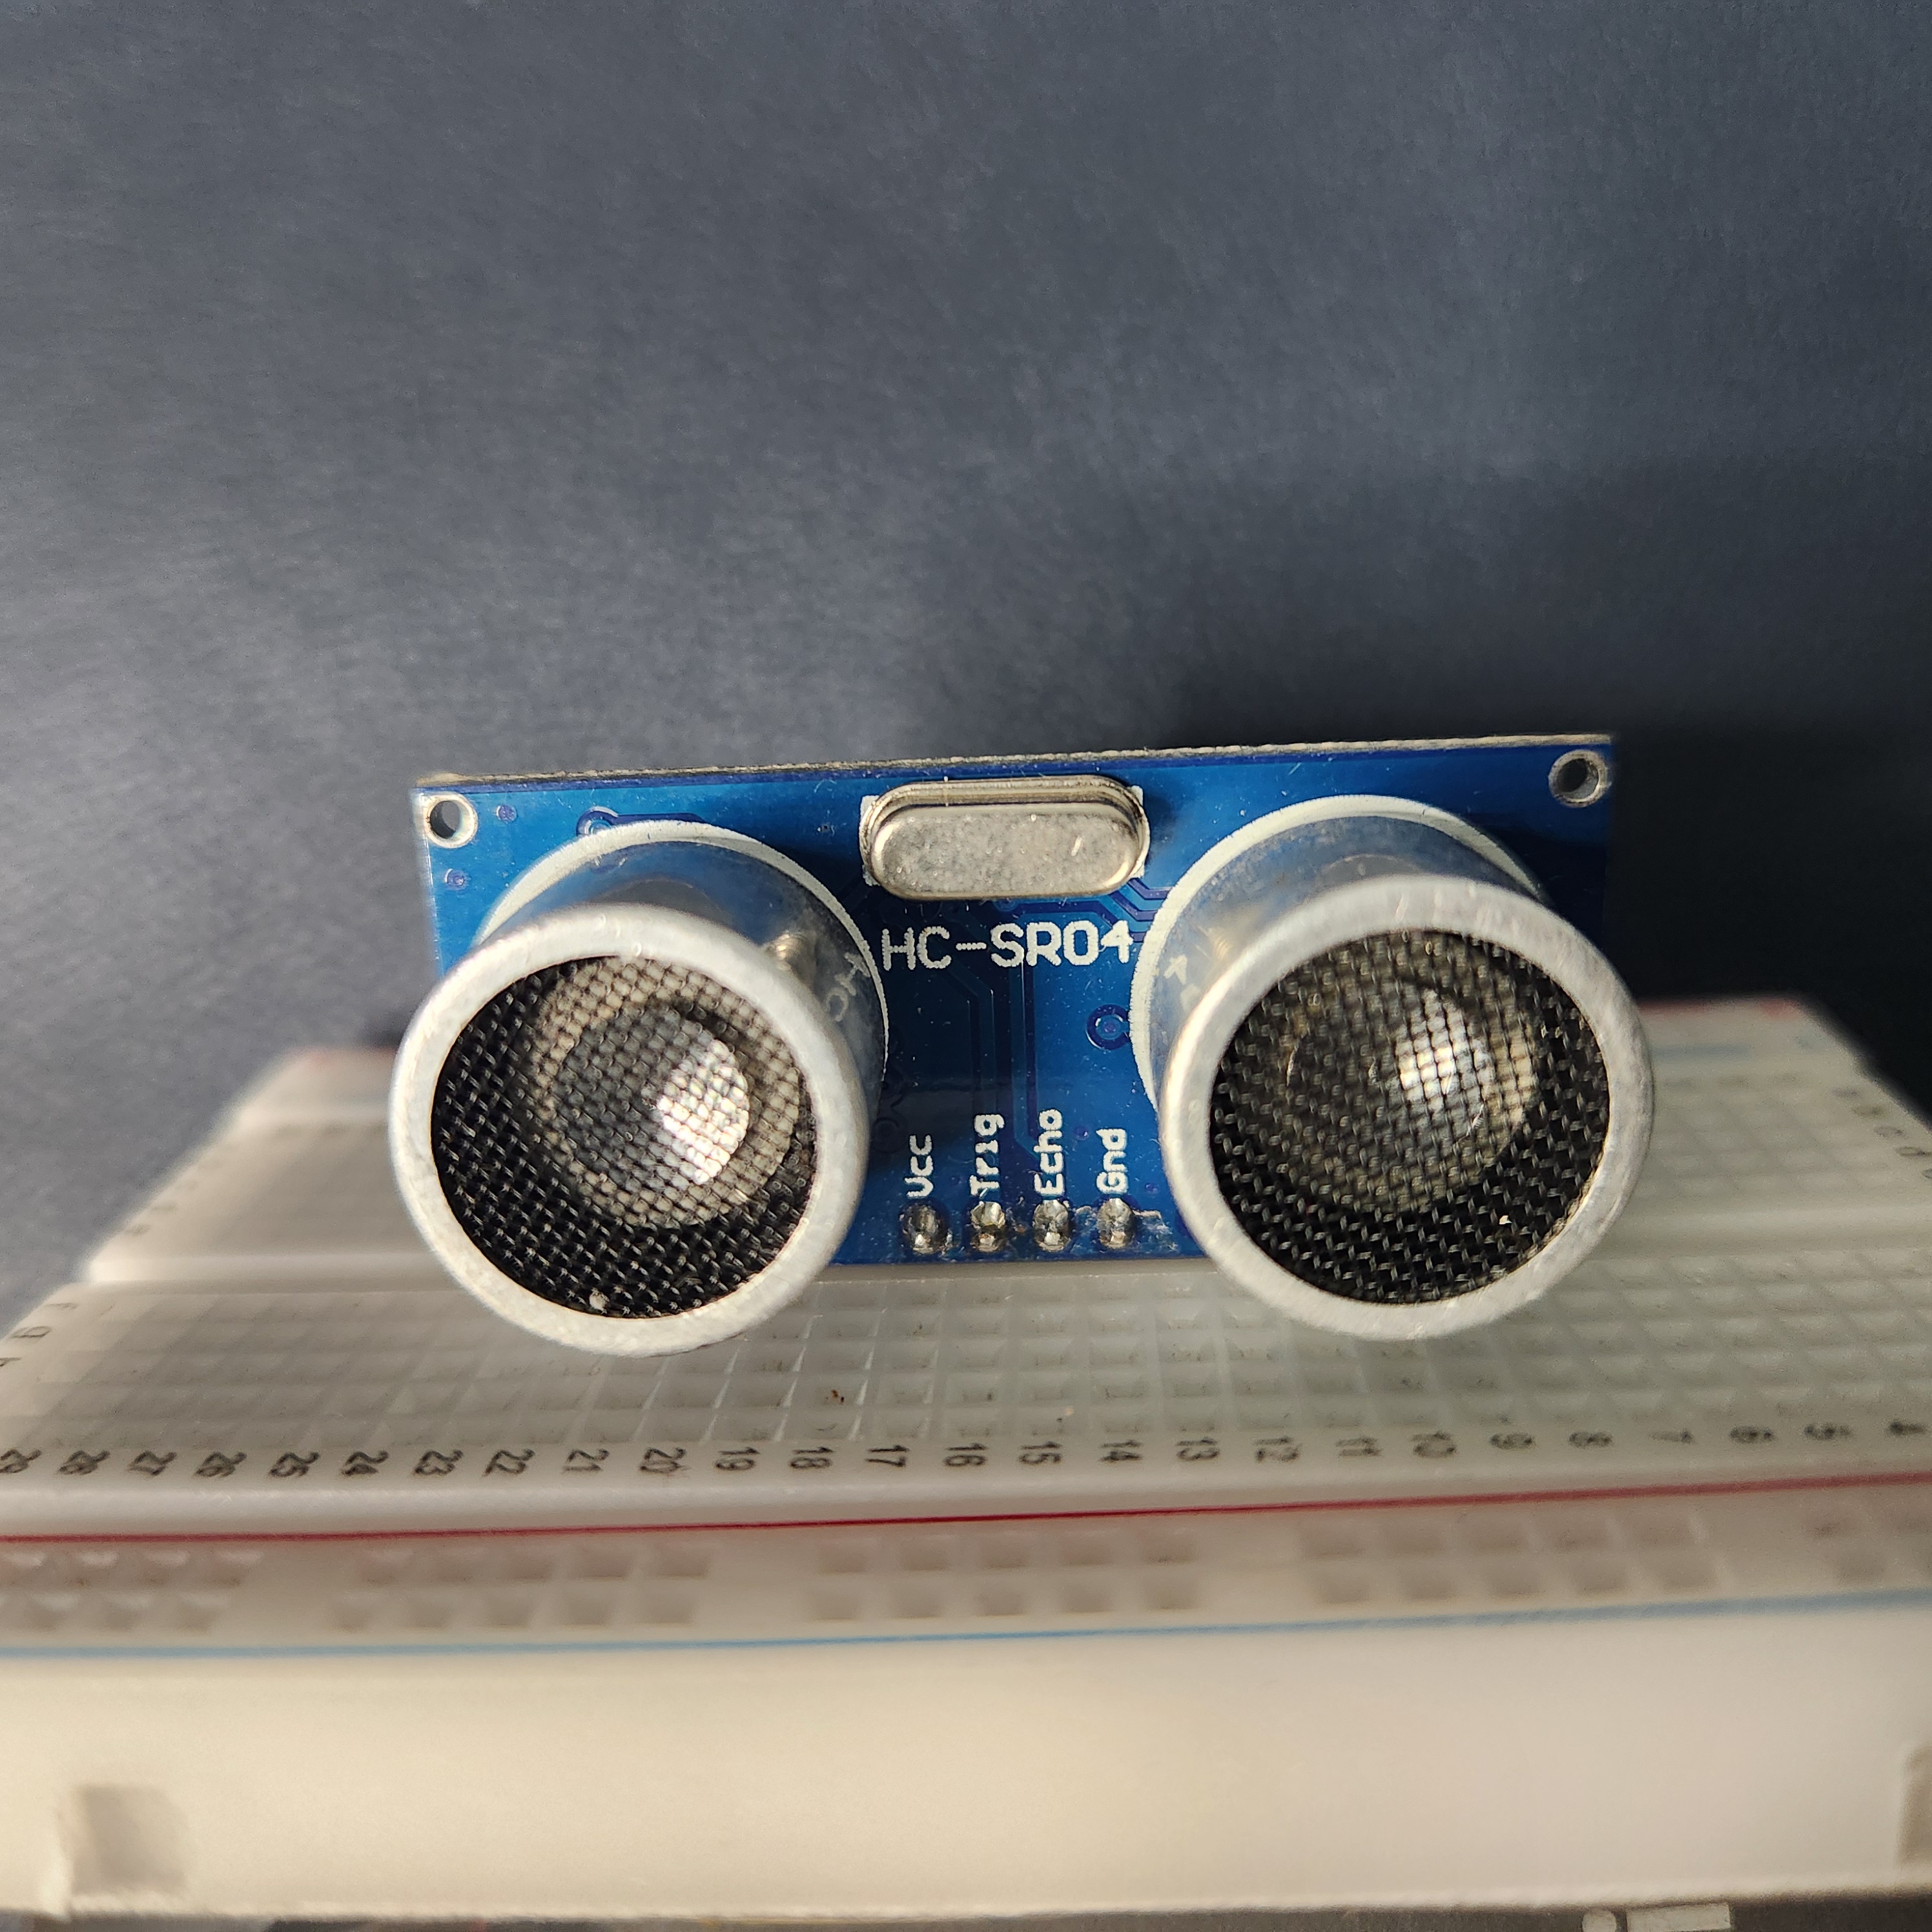
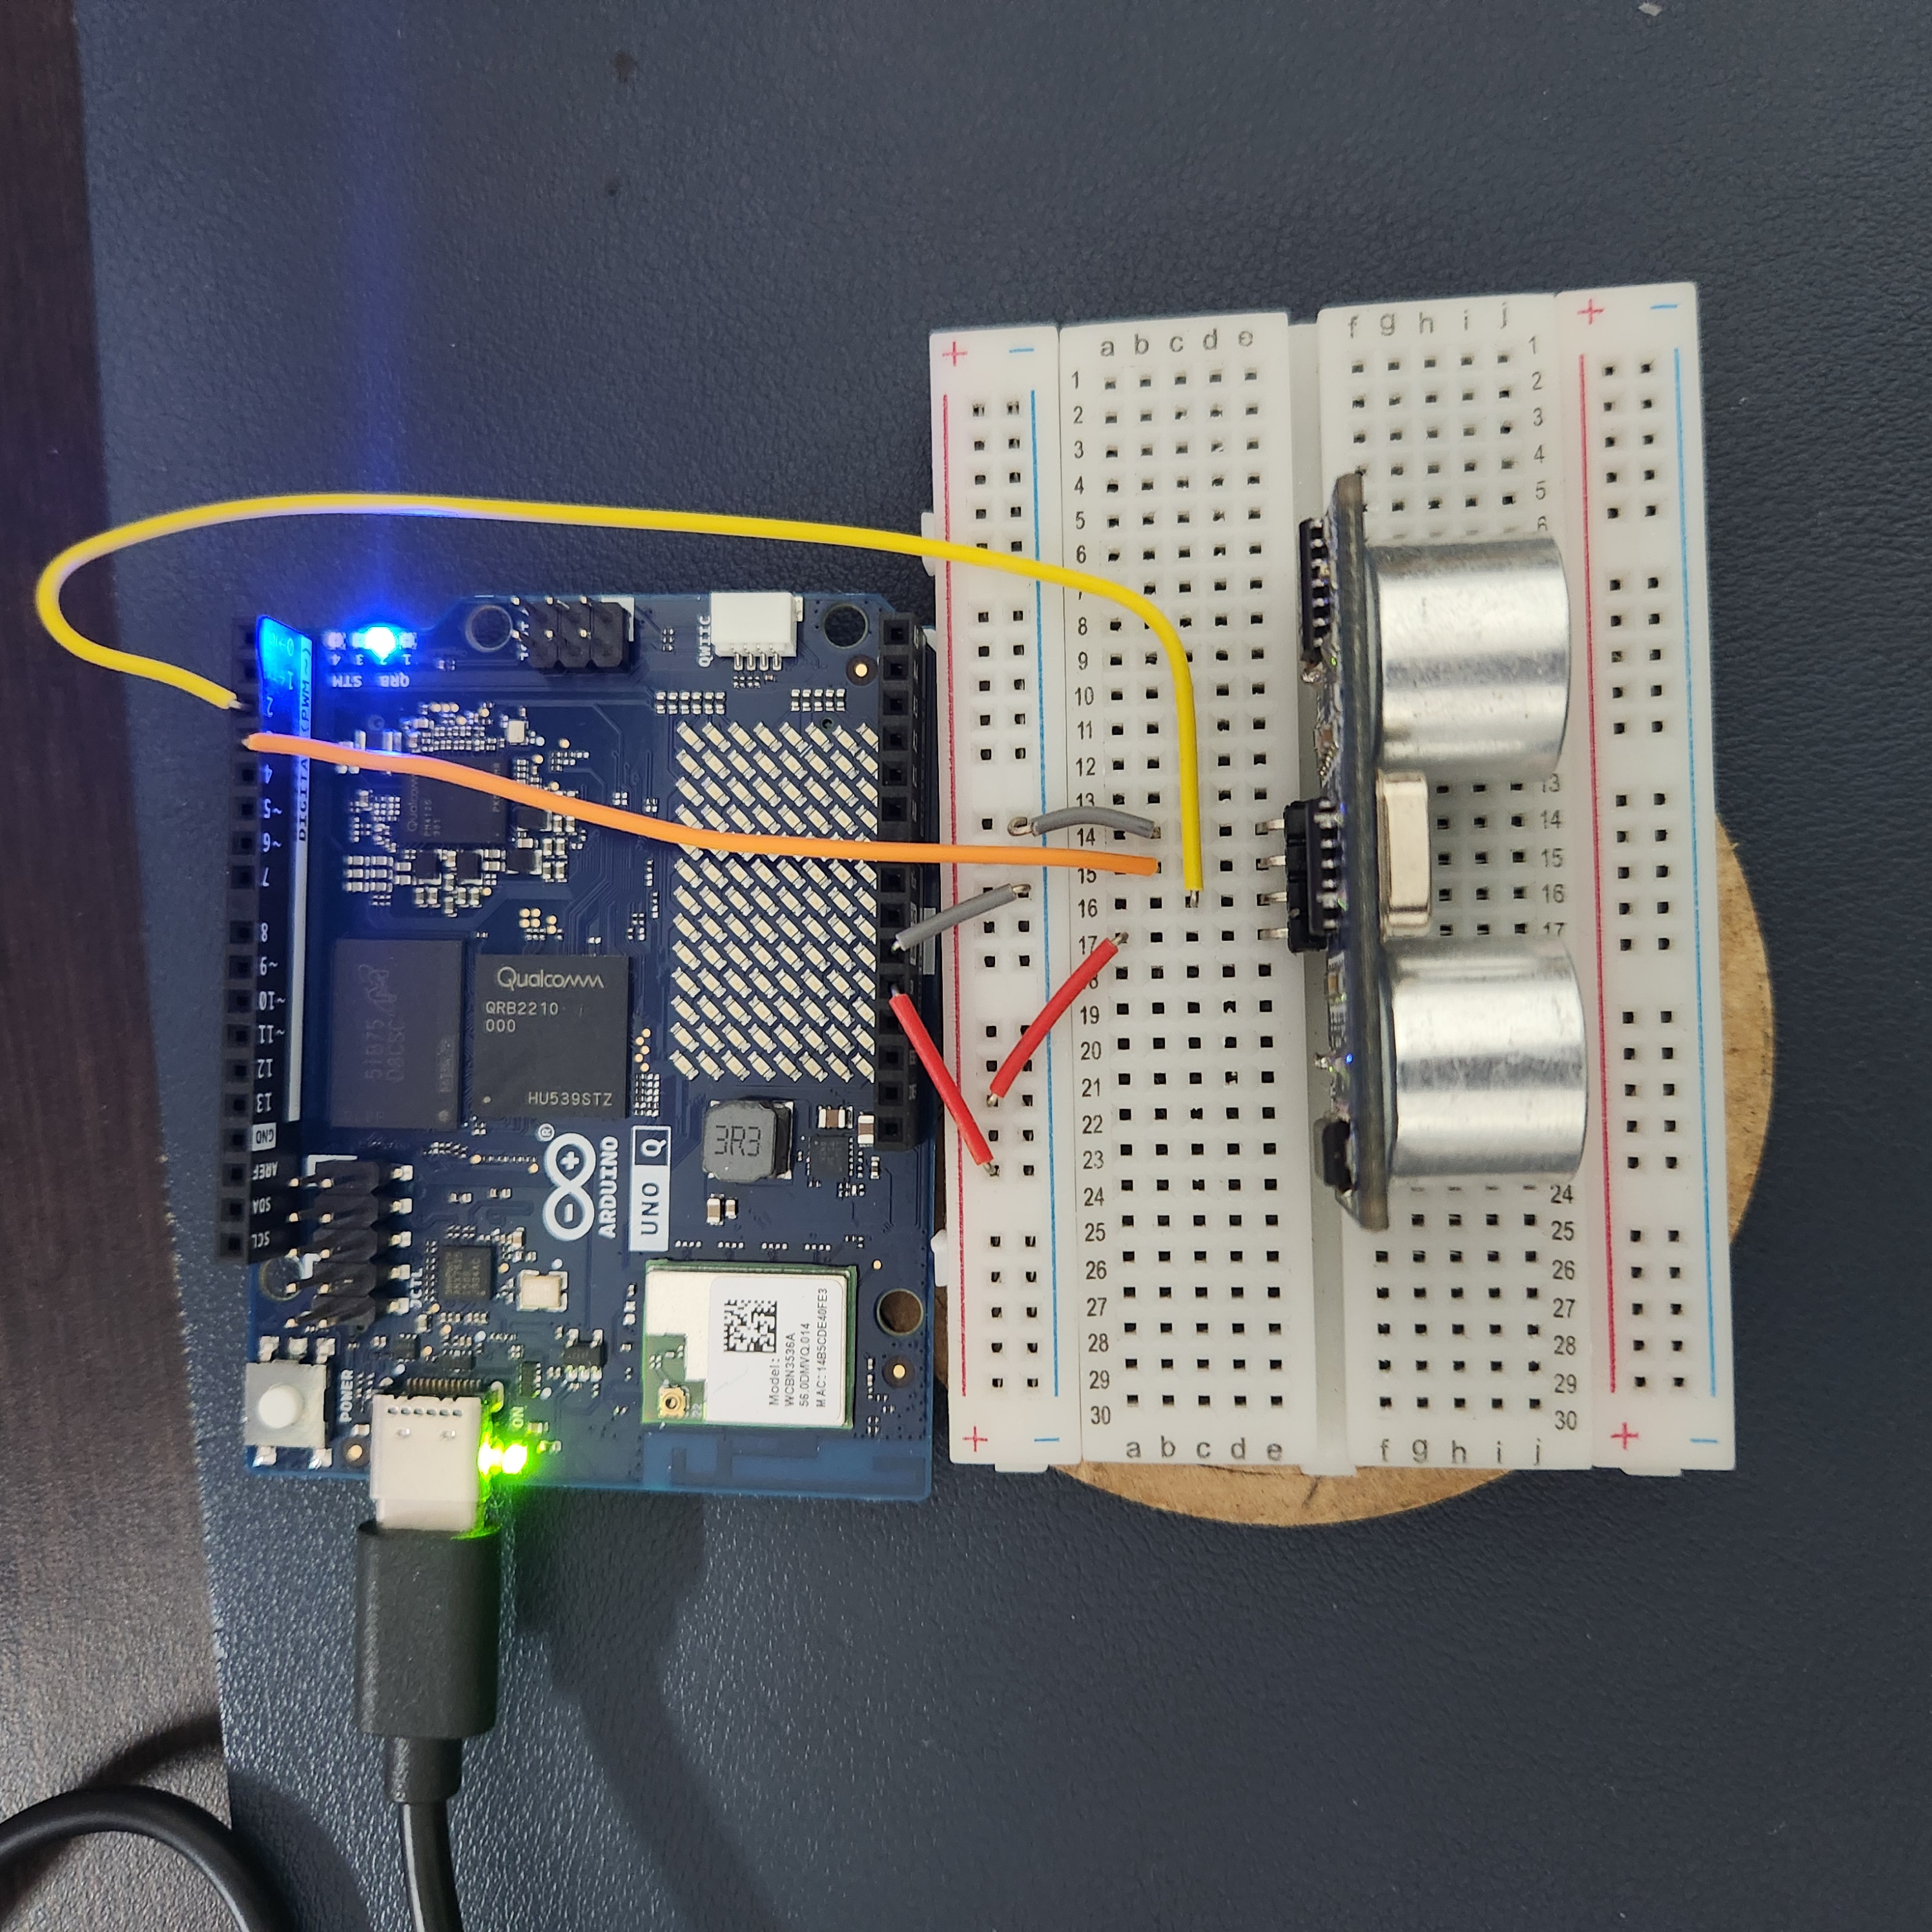
I used a breadboard to keep the wiring tidy.
Wiring
| HC-SR04 Pin | UNO Q Pin |
|---|---|
| VCC | 5V |
| GND | GND |
| TRIG | D2 |
| ECHO | D3 |
No voltage divider needed. The STM32U585's digital pins are 5V tolerant (except A0/A1 — a detail from Lab 1.1 that saved me a resistor here).
The App Structure
Same pattern as the blink app from Part 1 — an app.yaml, a sketch folder, and a Python folder:
q-sonar/
├── app.yaml
├── sketch/
│   ├── sketch.ino
│   └── sketch.yaml
└── python/
    ├── main.py
    └── requirements.txt
The MCU Sketch
The MCU does two things:
Reads the sensor in
loop()every 100msExposes the last reading via a Bridge function
#include "Arduino_RouterBridge.h"

const int TRIG_PIN = 2;
const int ECHO_PIN = 3;

float last_distance_cm = -1.0;

void setup() {
    pinMode(TRIG_PIN, OUTPUT);
    pinMode(ECHO_PIN, INPUT);
    Bridge.begin();
    Bridge.provide("get_distance", get_distance);
}

void loop() {
    last_distance_cm = read_distance();
    delay(100);
}

float read_distance() {
    digitalWrite(TRIG_PIN, LOW);
    delayMicroseconds(2);
    digitalWrite(TRIG_PIN, HIGH);
    delayMicroseconds(10);
    digitalWrite(TRIG_PIN, LOW);

    long duration = pulseIn(ECHO_PIN, HIGH, 30000);  // 30ms timeout
    if (duration == 0) {
        return -1.0;  // No echo — out of range
    }
    return duration * 0.0343 / 2.0;  // cm
}

float get_distance() {
    return last_distance_cm;
}
A few things to note:
pulseIn()with a 30ms timeout — this caps the max range at ~5 meters (plenty for indoor rooms) and prevents the sketch from hanging if nothing echoes back.0.0343 / 2.0— speed of sound in cm/us, divided by 2 because the pulse travels to the object and back.The
loop()is NOT empty this time. Unlike the blink app where the MCU just waited for Bridge calls, here the MCU actively samples the sensor. The Bridge functionget_distance()just returns the latest cached reading.
The Python Side
from arduino.app_utils import *
import time

def loop():
    distance = Bridge.call("get_distance")
    if distance < 0:
        print("No echo — out of range")
    else:
        print(f"Distance: {distance:.1f} cm")
    time.sleep(1)

App.run(user_loop=loop)
The Python side polls once per second. The MCU samples 10x per second.
This means the Python side always gets a fresh reading without needing to worry about sensor timing.
Deploy and Run
# Copy app to the board
ssh arduino-2gb 'mkdir -p ~/ArduinoApps/q_sonar'
scp -r q-sonar/* arduino-2gb:~/ArduinoApps/q_sonar/

# Start it
ssh arduino-2gb 'arduino-app-cli app start ~/ArduinoApps/q_sonar'

Check the logs:
ssh arduino-2gb 'arduino-app-cli app logs ~/ArduinoApps/q_sonar'
Distance: 46.3 cm
Distance: 137.2 cm
Distance: 44.6 cm
Distance: 48.0 cm
Distance: 17.1 cm
Distance: 138.9 cm
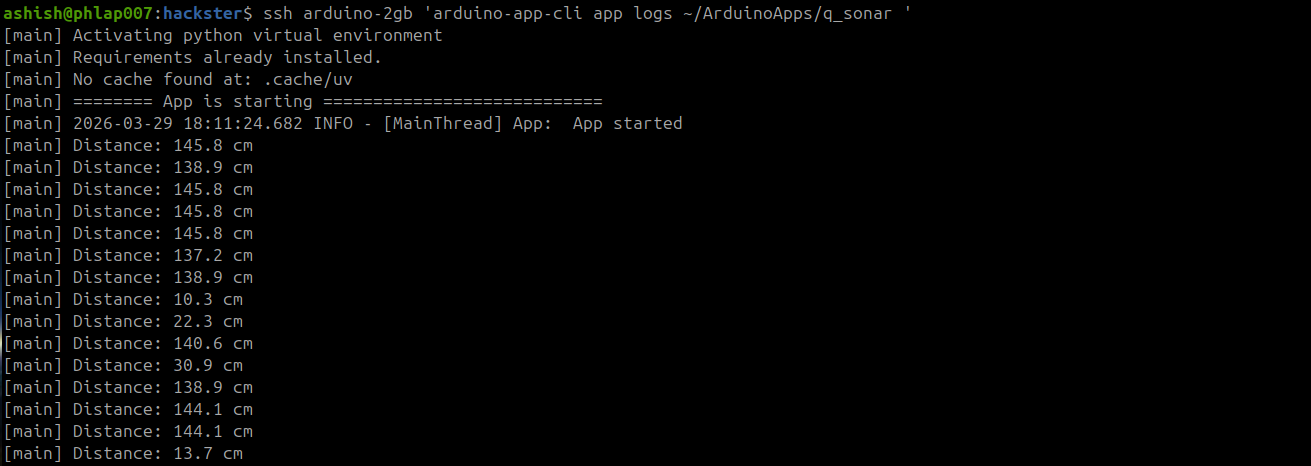
Move your hand in front of the sensor — near readings (17cm) and far readings (137cm to the wall) both respond correctly.
What Surprised Me
1. pulseIn() works perfectly on Zephyr. This was my main concern going in. Timing-sensitive functions can behave unpredictably under an RTOS, but the Arduino Zephyr core handles it cleanly. No jitter, no missed pulses.
2. I wired it wrong first. TRIG and ECHO were swapped. The sketch deployed fine, but every reading came back as "No echo — out of range."
I spent a few minutes reading the code looking for a Zephyr compatibility issue... when it was just two wires in the wrong pins. Check your wiring before debugging your code.
3. No external libraries needed. HC-SR04 only uses digitalRead, digitalWrite, and pulseIn — all built into the Arduino core for Zephyr. The only dependency is Arduino_RouterBridge for the Bridge pattern.
4. The MCU loop + Bridge pattern is the right architecture. The MCU samples at its own pace. The Python side reads when it needs to. Neither blocks the other.
This is exactly how the robot will work — the MCU manages real-time sensor reads, the MPU handles decision logic. One pattern, many sensors.
What's Next
The sensor works. The Bridge pattern works.
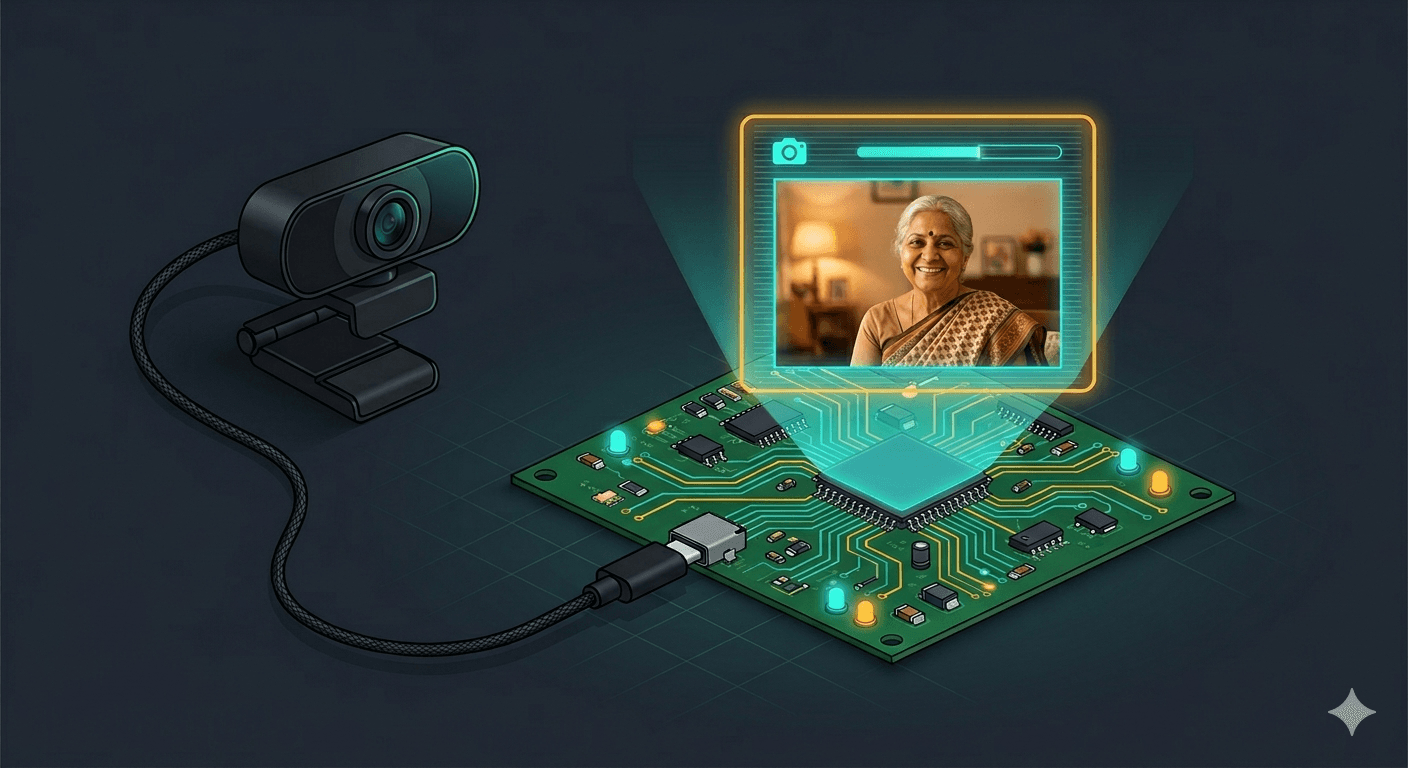
Next up: connecting a USB webcam to the MPU's Linux side — giving the robot eyes to go with its sonar. After that, bridging sensor data and camera feeds together for the robot's perception layer.
Follow along as I build an eldercare robot, one sensor at a time.
This is part of my journey building HomeGuard Parivaar — an autonomous eldercare robot for Indian families, built with Arduino UNO Q.
This is a hobby project and I'm learning by building. If you have suggestions, corrections, or criticism — I'd genuinely love to hear it.
Co-authored with Claude Code (Anthropic) — my AI pair-programming partner for this build. Cover image generated with Gemini (Google).